Velleman K8055 - [K8055 Software Tutorial]
Now your project is ready for the real programming. First we need to add my K8055 class to the project. This is a software Class with functions to access the K8055. You don't need to use my class, but the class makes it easier to control the K8055.
You should download and unzip the class, and then add it to the project. You can do this by clicking the menu Project\Add Existing Item...(CTRL+D) and select the K8055 class you've just downloaded. The class will be added to your project: Visual Studio will copy the file to your project directory.
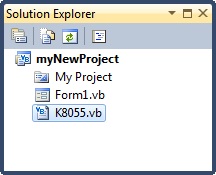
The K8055 class is now included to your project. You can start to write some code. Go to your solution explorer (CTRL+ALT+L) and double click the Form1.vb (the main screen for your program).
You will now see Form1's interface designer - the tool to design the GUI (graphical user interface). We don't need it at this point, and we will go to the code view instead. You can access it by clicking the menu View\Code (F7).
The code view will show you the actual source code for the newly created project. It should be almost empty:
    Public Class Form1

    End Class
The code below is some sample code. You can copy/paste it into the existing code. (make sure you overwrite all the existing code, the lins Public Class Form1 / End Class should appear only once!)
    Public Class Form1

      Private myK8055 As New K8055

      Private Sub Form1_Load(ByVal sender As System.Object, ByVal e As System.EventArgs) Handles MyBase.Load
      	Dim connectionOK As Boolean
      	connectionOK = myK8055.connect(SK5:=True, SK6:=True)

      	If connectionOK Then
      		myK8055.setAllDigitalOutputs()
      	Else
      		MsgBox("The K8055 is not connected")
      	End If
      End Sub
    End Class
This simple program will try to establish a connection with the K8055. This is attempted during the loading of the form, just after the application is started.
The result of the connection attempt is stored inside the connectionOK variable, which is a boolean that can only hold two possible values: true or false.
The value of the connectionOk variable will be checked by an IF-statement. IF the connectionOK is true, all digital outputs will be set. ELSE it indicated the K8055 could not be connected to, and an error message should be given.
The myK8055 variable hold an object, an instance of my K8055 class. It is declared as an instance variable (outside any subs/functions) to make it accessible from any sub or function.
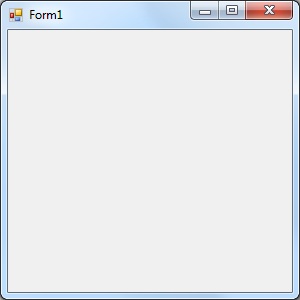
You can now test your program by clicking the Start Debugging button (the green arrow). Alternative you can press the F5 button. Your program will start...
The program will show our empty form (Window), because we didn't design one. But if everything went well the LEDs should light up during the start of the program. Otherwise a message box with an error will show up.
You can stop your program by closing your window (click the X at the right corner), or by clicking the Debug\Stop Debugging menu in Visual Basic.
Let's build another example to read data from the INP1 button on the card: We will start with the same empty form as before, but now you put the following source code in the form's code section:
Public Class Form1
Dim myK8055 As New K8055
WithEvents timer1 As New Timer
Private Sub Form1_Load(ByVal sender As System.Object, ByVal e As System.EventArgs) Handles MyBase.Load
Dim connectionOK As Boolean
connectionOK = myK8055.connect(SK5:=True, SK6:=True)
If connectionOK Then
timer1.Enabled = True
timer1.Interval = 100
Else
MsgBox("The K8055 is not connected")
End If
End Sub
Private Sub timer1_Tick(ByVal sender As Object, ByVal e As System.EventArgs) Handles timer1.Tick
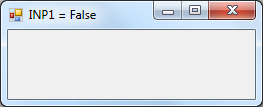
Me.Text = "INP1 = " & myK8055.getDigitalInput(1)
End Sub
End Class
This program is similar to the first sample, but I now added a Timer (timer1) variable to the code. This timer will cause to raise the event timer1_Tick() every 100 milliseconds. During this event the K8055's digital input #1 is read, and the result is put in the title bar of the program (Through the Me.Text property). The result can be either true or false.
The timer is only activated if the program could connect with the K8055 during the Form1_Load event.
With these samples you can start writing your own K8055 software. In the future I will add some additional software samples for K8055 applications. For now you can already find some samples under the remote controlling section of this site.
![]()
![]()
Copyright ©1998-2026 Vanderhaegen Bart - last modified: August 24, 2013
